![]()
![]()
![]()
![]()

![]()
![]()
![]()
![]()
![]()
![]()
![]()
![]()
![]()
![]()
![]()
- Use NiMH rechargeable batteries instead of alkaline batteries. This is a good solution for mobile robots but it has some shortcomings. You need to keep a pack of batteries charged when the first is empty, charging 6 cells is not easy since most chargers have only 4 slots, and the 7.2V voltage obtained with 6 NiMH batteries seriously reduces the power and rotation speed of NXT motors (see performance charts).
- Use LEGO Li-ion battery pack. A very interesting product, with some shortcomings too... The battery pack is bigger than the batteries cover it replaces, meaning that some robots that have parts just behind the regular battery lid are impossible to build.
- Build your own mains adapter, as described here. No autonomous robots with this one, but full power at economical price for your static constructions...
External
power supply for NXT®
NXT is powered by 6 alkaline cells that drain rather fast for heavy duty robots. Your pocket money may follow the same curve if you use your NXT for extended periods! You have a few options to avoid that:
WARNING:
Do not try to build this adapter
if you don't know what you are doing.
I shall not be held responsible if you burn your NXT
with incorrect voltage or bad polarity !
Schematics
|
The schematics is the easy part... A power jack socket is connected to NXT supply contacts through optional protection elements. F1 is a 3A fast blow fuse (rating should match intensity that can deliver your mains adapter). D1 is a transient suppressor diode, 9V rated. It should protect your NXT from mains adapter failure (or from plugging the wrong plug in your NXT!). The one I used is a Fairchild SMBJ9V0A. These protection components are not really necessary, but I strongly suggest that you mount them to avoid problems. |

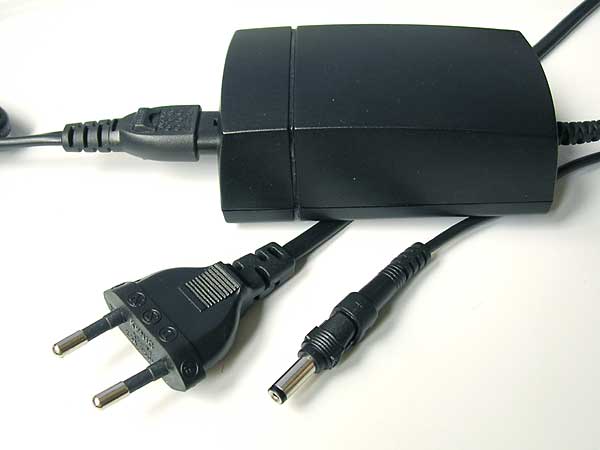
Mains adapter selection
|
I selected a switch mode power supply, that delivers a clean, well regulated 9V tension. |
|
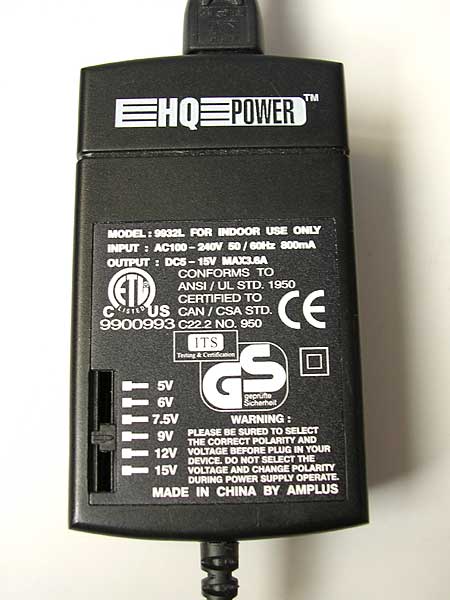
It can deliver a hefty 3.6A, more than enough for the NXT. I suggest to choose an adapter that can deliver at least 2A to be able to supply heavy duty models. Note that this adapter has a switchable voltage output, make sure you don't exceed 9V. The motor drivers which are connected directly to that supply are specified for 9V supply and should never be powered at more than 10.5V. |
|
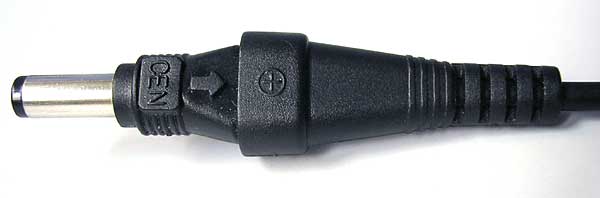
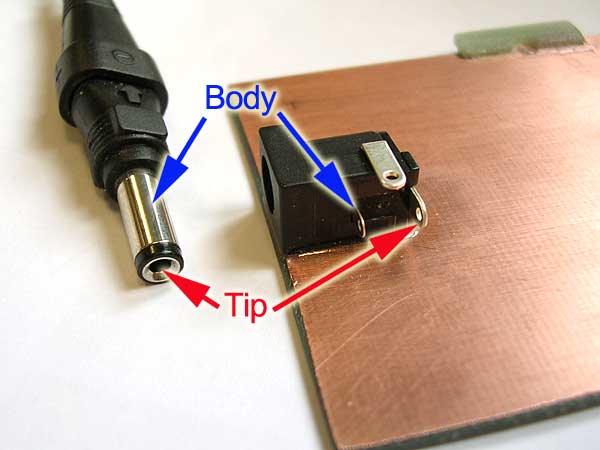
Similarly the plug of these supplies often have a polarity selection option, and documentation for that is generally terse, or even misleading. I suggest that you verify with a voltmeter that the polarity is conform to your expectation! The most common choice is th have the + in center, - on plug tube, that's the one I use for this project. |
|
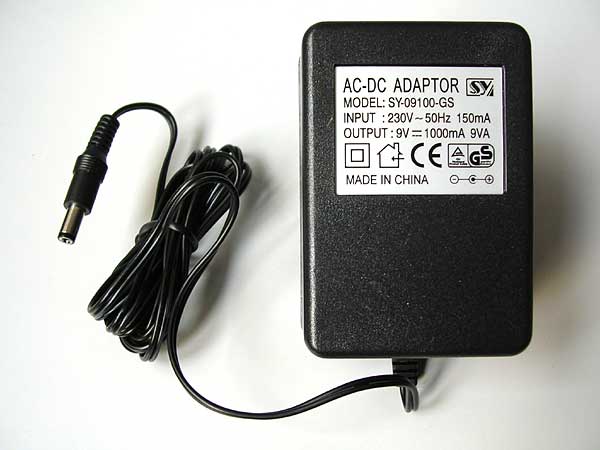
Warning: Cheap transformer based wall adapters, such as the one photographed here, are NOT suited for this use: their regulation is poor at best, and voltage at light load is much higher than 9V. Moreover, at the power level required here, they are bulky and very heavy. |
Mechanical construction
|
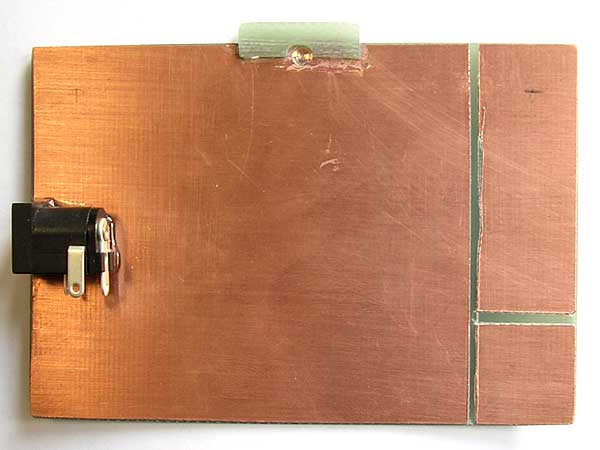
The mechanical construction requires some care to get a supply plate that fits well NXT bottom. We start from a blank FR4 (glass loaded epoxy) single sided PCB plate, the small piece will be glued to form plate hinge. Two areas are electrically separated with a knife from the main one (take care of your fingers!) to support fuse and diode. |
|
The board dimensions. The two notches at bottom, not shown on photo above, are made with a metal saw and will receive the retainer clip. |
|
The socket and the hinge are epoxy-glued to the board. Since my hinge was slightly too large, I had to trim it after mounting (hole in center). The hole in the socket must be centered. |
|
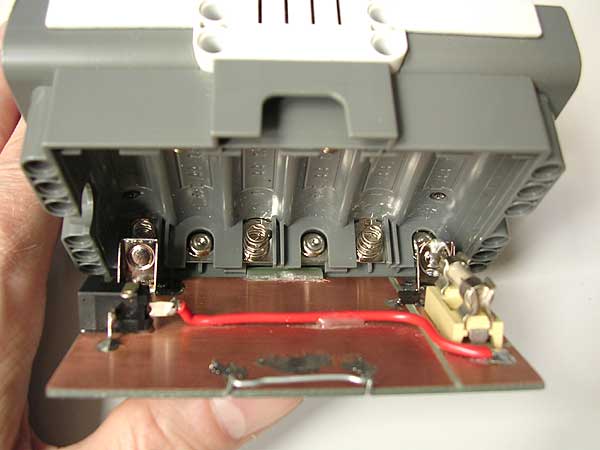
Metallic battery holder clips are used to connect NXT batteries contacts. I used Keystone 596 clips. The bottom retainers are cut before mounting. The clip with spring was not available at the time... |
|
...so I scavenged a spring from a cheap battery holder and soldered it to a 596 clip. |
|
Positions of socket and clips. |
|
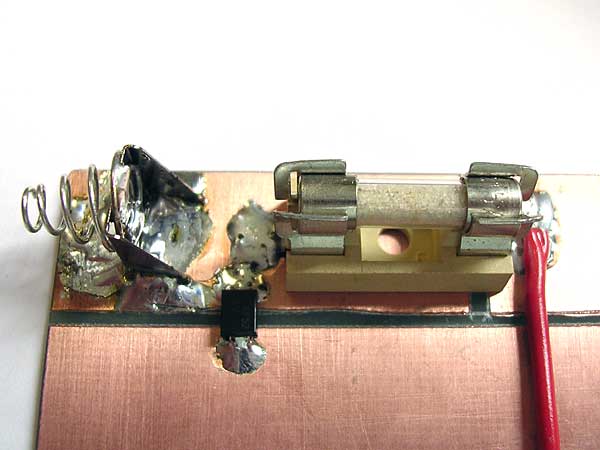
All the elements are surface-soldered to the board. As the copper area of the board is large, it makes a good heatsink. Use a powerful iron with a large tip and high temperature. |
|
Detail of the diode area. |
|
The plug and matching socket terminals. |


The paper clip solution
|
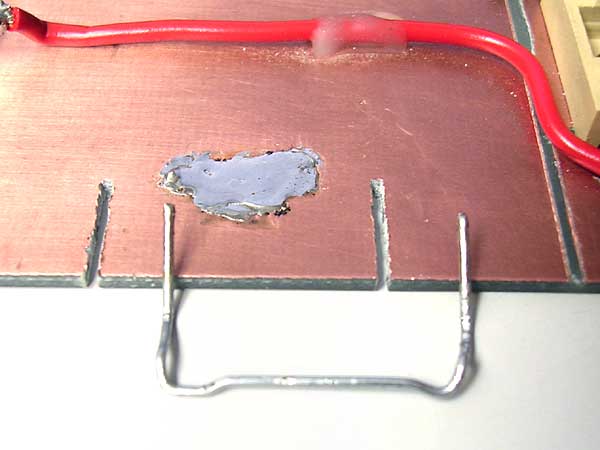
I wondered for a while how to emulate the latch that hold battery lid... a bent paper clip provided the solution |
|
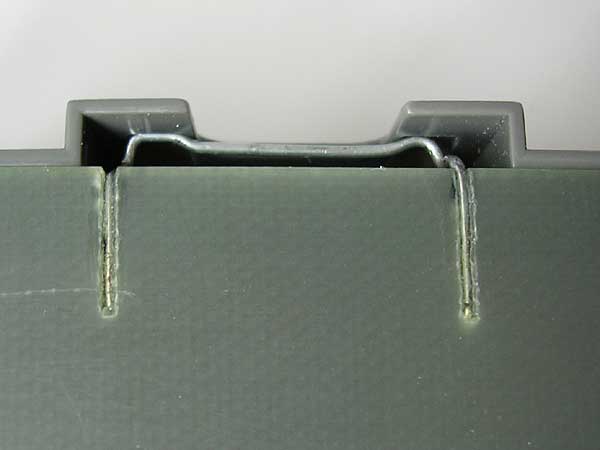
It is inserted in the two notches of the board (so it doesn't protrude on either side of the plate)... |
|
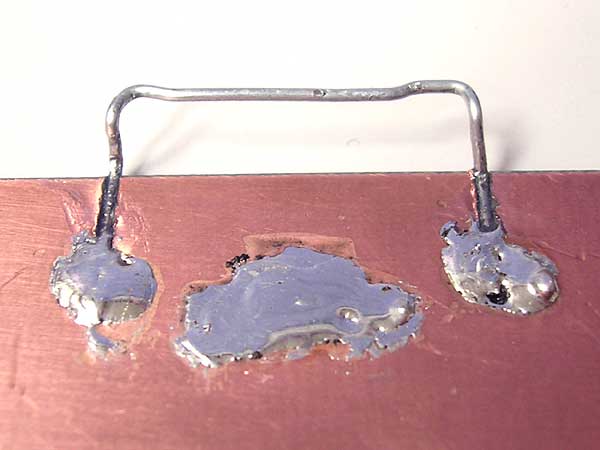
...and soldered (and/or glued) there. |
|
Clip dimensions. |


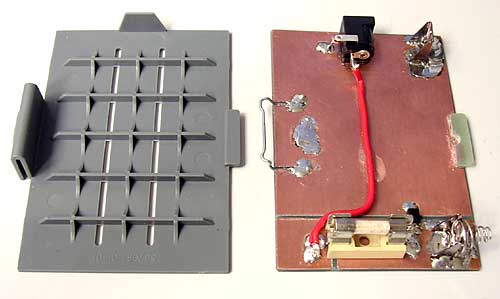
Completed replacement plate
|
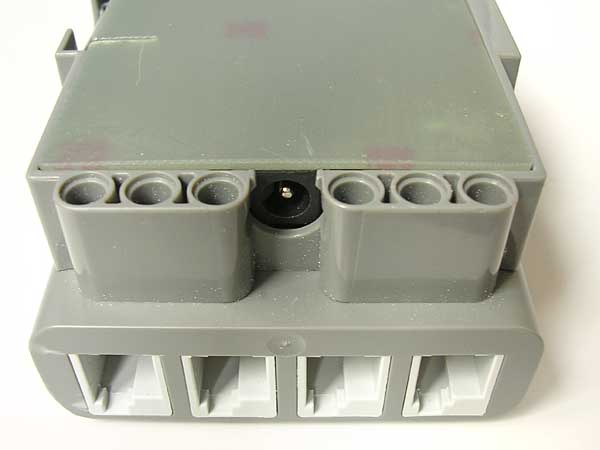
Ready for insertion. |
|
Lid closed. |
|
The retaining clip. Precise shape has to be trimmed with pliers... |
|
Just plug... and play! |

WARNING:
Do not try to build this adapter
if you don't know what you are doing.
I shall not be held responsible if you burn your NXT
with incorrect voltage or bad polarity !
![]()
![]()
![]()
![]()
![]()
![]()
![]()
![]()
![]()
![]()
![]()
![]()
![]()
![]()
![]()