![]()
![]()
![]()
![]()

![]()
![]()
![]()
![]()
![]()
![]()
![]()
![]()
![]()
![]()
![]()
Lego® Technic Motor (43362) internals
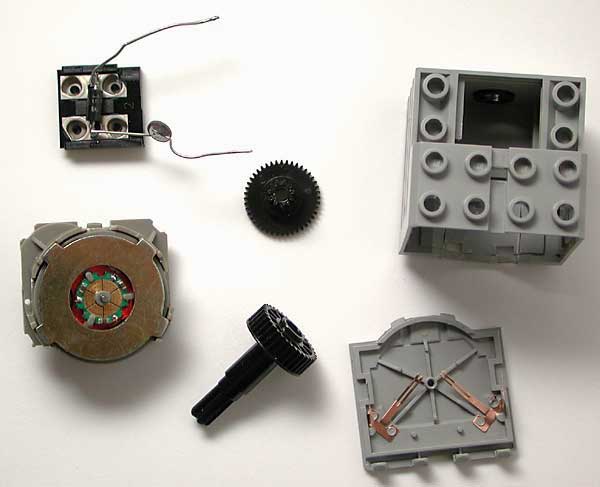
I recently bought two new 9V mini-motors from Shop@Home, that happened to be the new kind of motor first described by Mark Riley's post on Lugnet. As a few week ago I repaired a motor of the older type that had a broken solder, I thought it would be interesting to compare both motors... I removed back cover, discovered that it was wired to the rest of the motor, and immediately reinstalled the cover. Arrghl !!! the motor didn't turn any more, I had done something wrong with my brand new and expensive motor !
So I had only one solution: keep on taking apart the motor, find what went wrong and reassemble the motor. Of course, I photographed every parts...
Stef Mientki has done a similar disassembly of a 71427 motor, see his photos and comments here.
Caution
! it is impossible to safely disassemble |
|
|
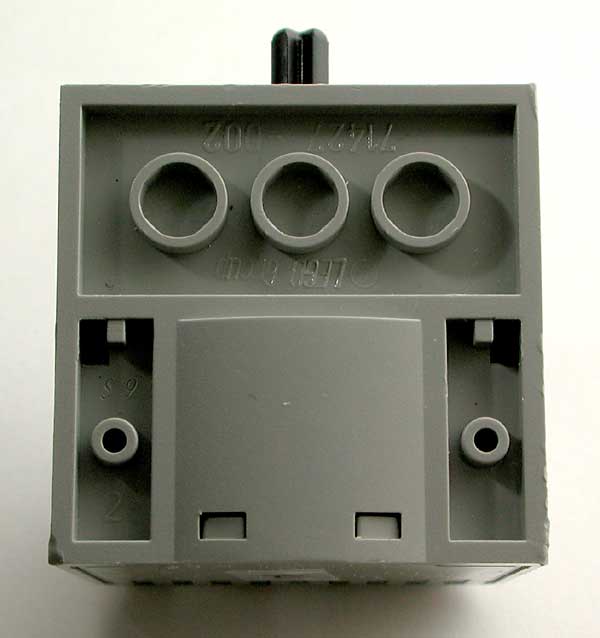
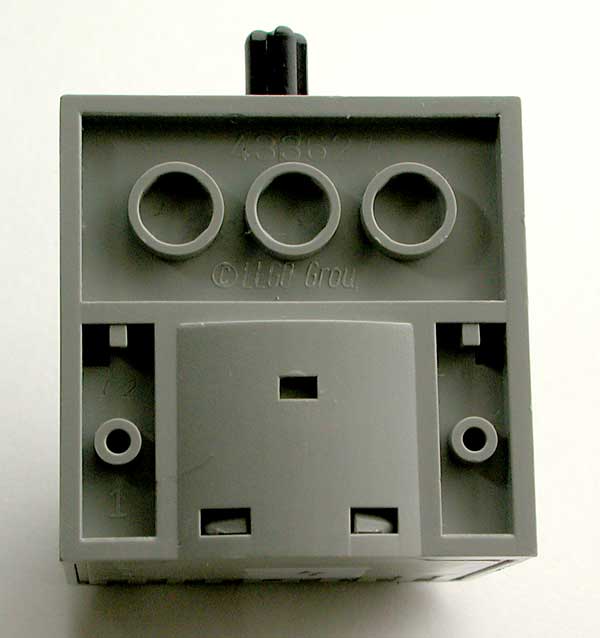
Externally, there is very little differences between these motors (see also Mark Riley's comparison photos), except that 43362 is lighter: 28g versus 42g. Actually,
it seems that you can get 71427 core motor housed
in 43362 case. See
this Tobbe Arnesson Lugnet post. |
|
|
|
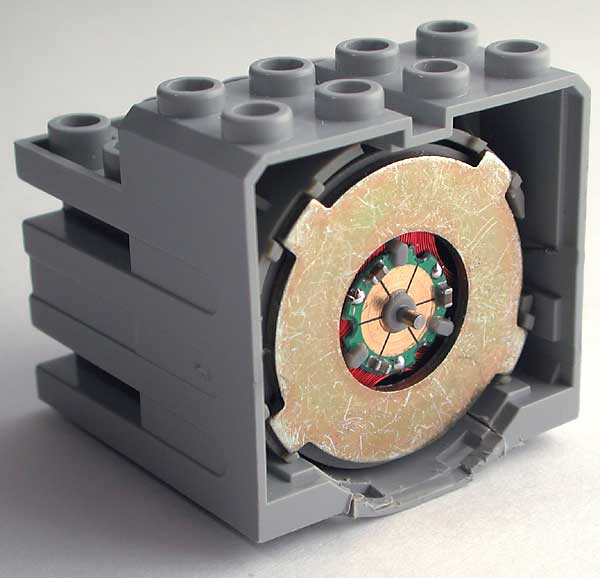
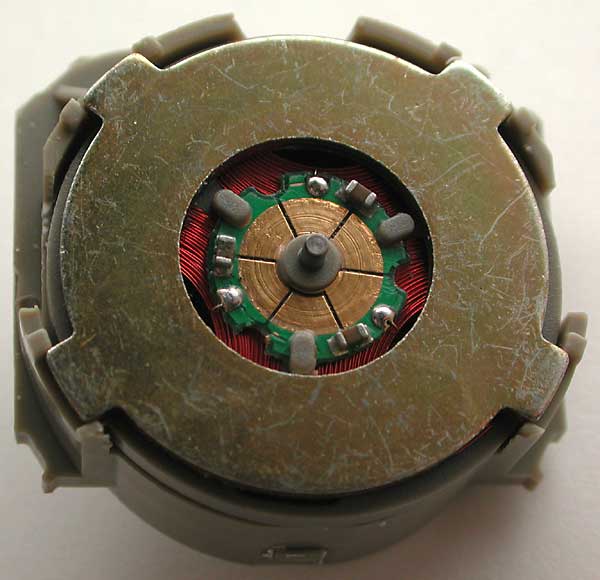
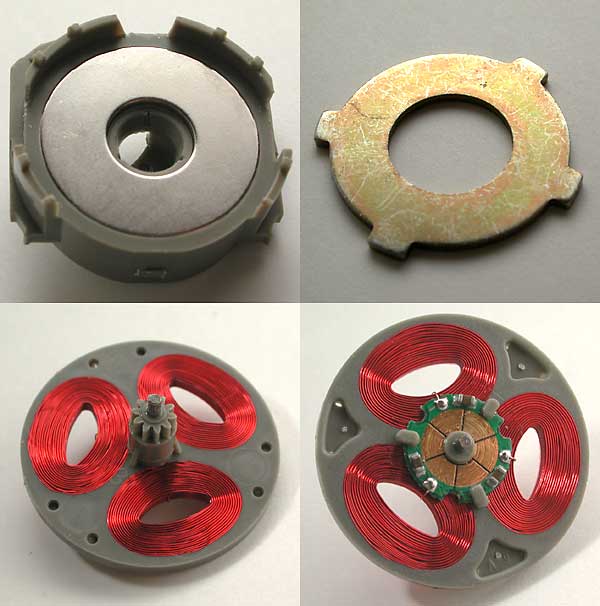
...but
the core is very different. Most notably, brushes
have very light contact on the axle of 71427, while
they rub a small printed circuit board on 43362.
This higher friction explains why 43362 stops faster
when you give the shaft a twirl, and why its no-load
current is higher (9mA vs. 3.5mA). |
|
|
|
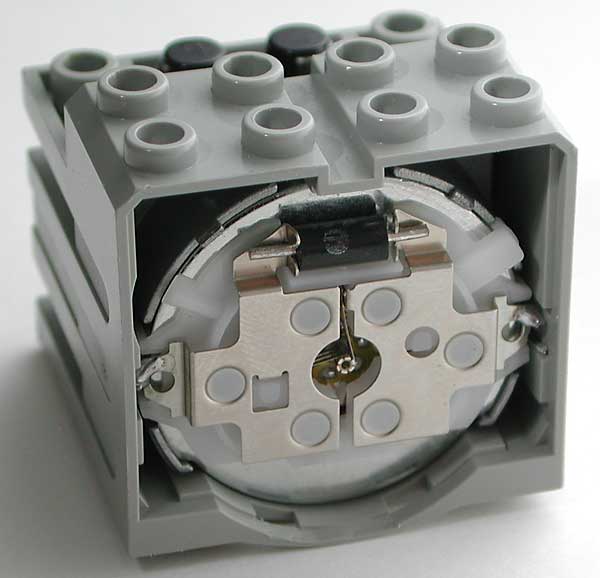
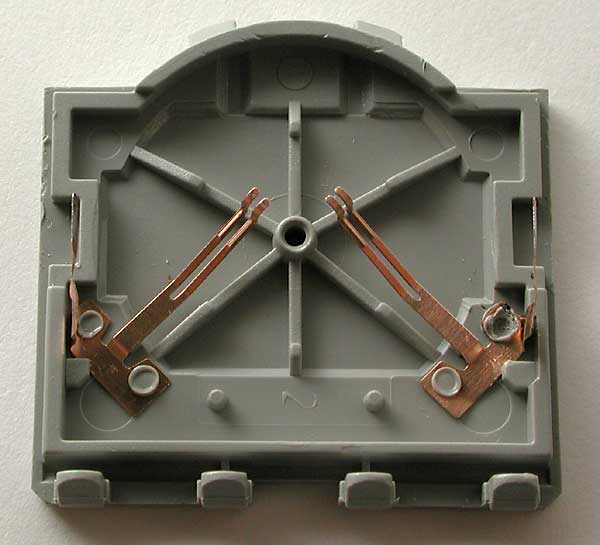
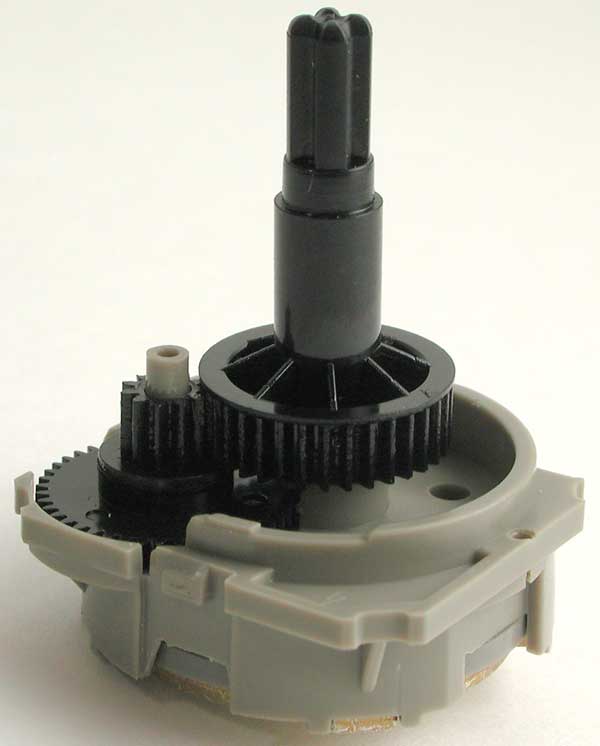
Motor
brushes are fixed on back cover and soldered to
top connector. To open this motor, you have to remove
top and bottom clips that maintain core in the case.
This is impossible without some "plastic surgery",
you can see the scars on the lower part of the case. |
|
|
|
|
|
Speed
reduction is 1/14. (confirmed by Bernard
Catt) |
|
|
|
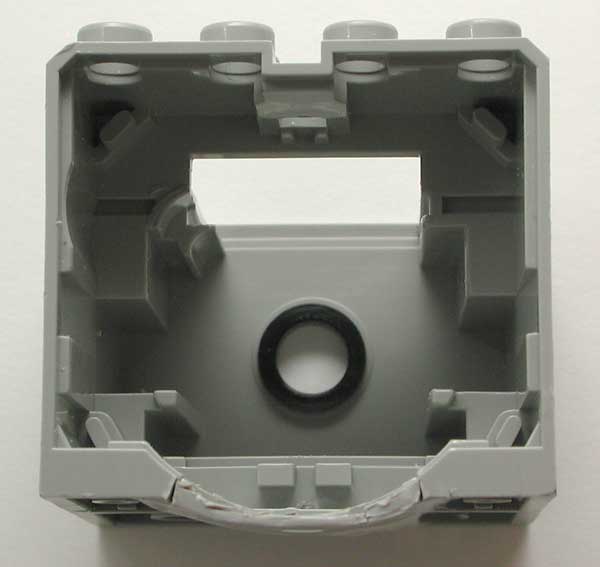
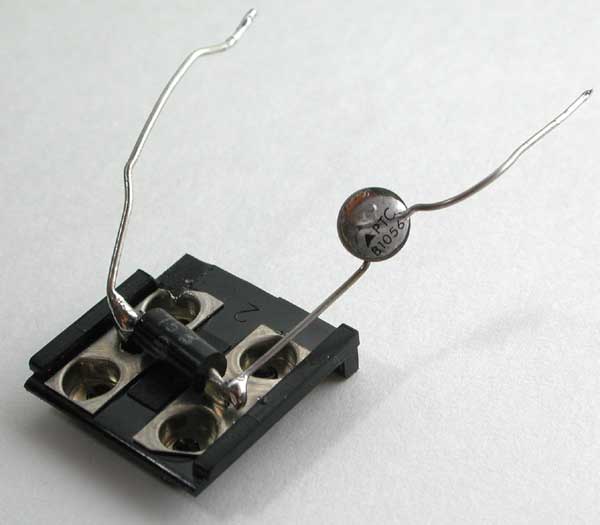
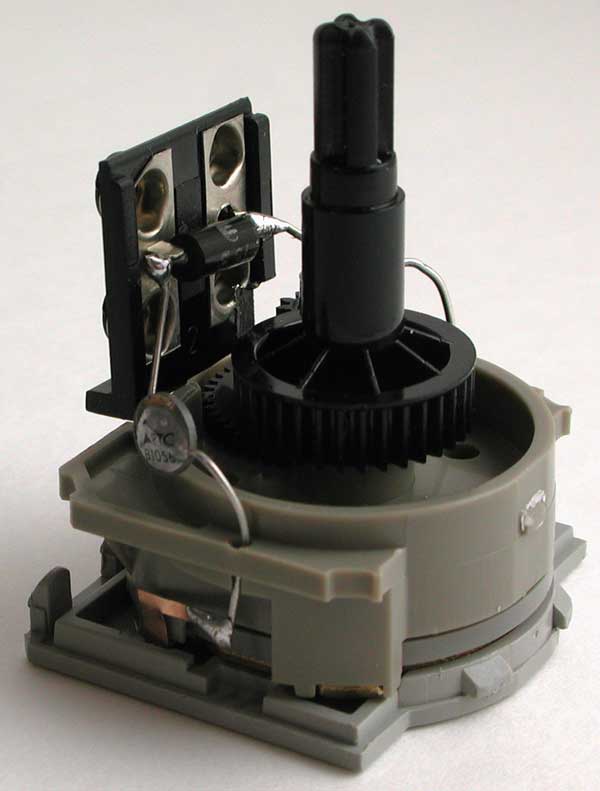
The top connector show a PTC resistor used to protect the motor from over-current: if the temperature rises too much, its resistor increases and limits current. This component shows Epcos logo and reference B1056, but unfortunately I was not able to locate the datasheet. The voltage drop across this resistor (I forgot to measure its value) may be the reason of the slightly lower efficiency of 43362. To reassemble the motor, you have to stack everything, slide motor case from top until it clips. Note that the assembly as shown on the photo doesn't work, the PTC is not placed correctly and prevents the case to close. On this photo, you can also see
the problem I had when I removed back cover: the
solder point between brushes and wire moved and
rubbed against rotor disk. This added friction was
enough to seize the motor. |
|
...After a two hours struggle with this motor (including
photo shooting), I was finally able to put together everything,
with a smoothly rotating axle... phew !!! I now have a perfectly
working motor, with only a few scars...
![]()
![]()
![]()
![]()
![]()
![]()
![]()
![]()
![]()
![]()
![]()
![]()
![]()
![]()
![]()