![]()
![]()
![]()
![]()

![]()
![]()
![]()
![]()
![]()
![]()
![]()
![]()
![]()
![]()
![]()
Synthesize-your-own
NXT® connector plug
The LEGO NXT kit uses connector that are very similar to regular telephone plugs. For safety reasons, LEGO could not use telephone plug, so they chosen a variant with the latch offset to the right side. Unfortunately, this connector is not available anywhere, even if yet another version (called "DEC" connector) can be easily found... but with the latch on the wrong side!
December 2006 update:
|
Mindsensors now sells NXT-style RJ12 connectors! Warning: You will need to customize a regular RJ12 crimping tool (for example this low cost one) to use these connectors. More on this when I have hacked mine! |
|
Michael Brandl was faster than me to customize his crimping tool. Here is his method (in German). |
|
...and they also offer NXT compatible sockets to build your own NXT compatible devices. Warning: contrarily to most RJ sockets, pins have two staggered lines of 2mm pitch pins (instead of 2.54mm pitch). |

- the latch must be moved to the right of fhe connector
- RJ-12 latch is wider and will need to be shrunk to match NXT latch size.
As NXT cables were in short supply, and as I wanted to experiment with the new sensors and motors, I crafted a few connectors from regular RJ-12 phone connectors... here is how. I have converted about 10 connectors, it's rather easy if you have the right tool and are reasonably skilled. I can now convert a connector in less than 5 minutes (glue curing time not included)...
|
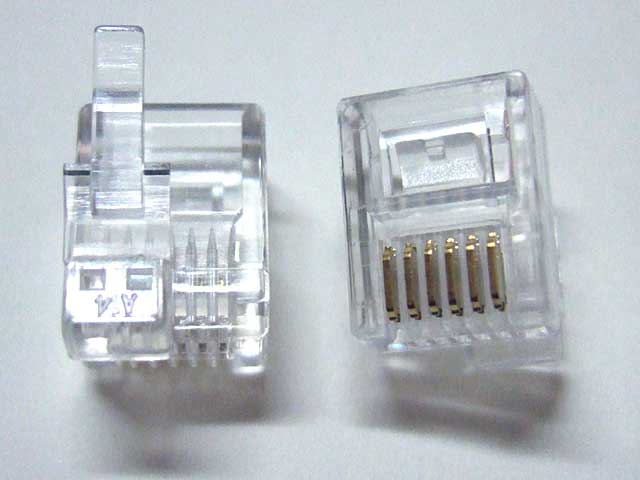
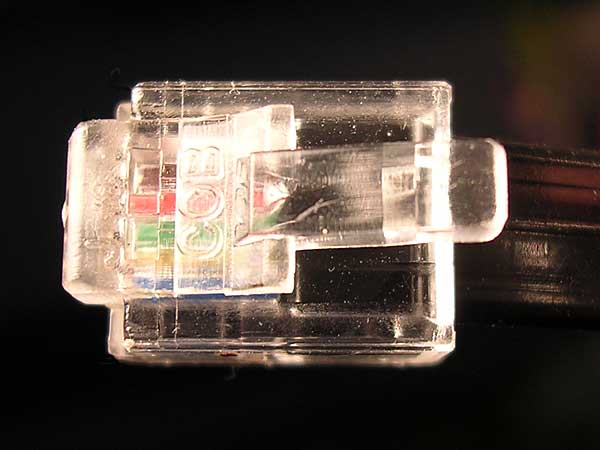
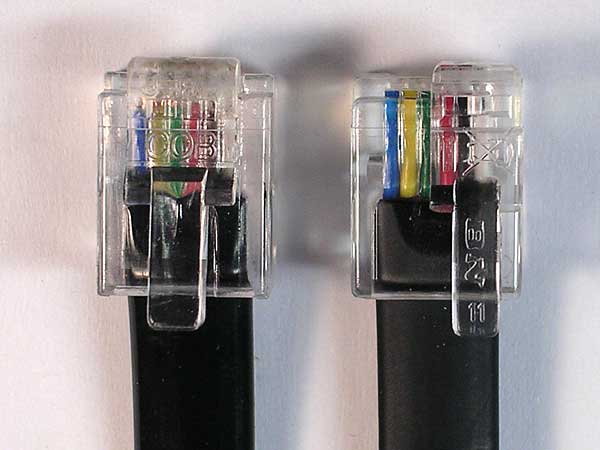
We start with a regular RJ-12 plug, already crimped on its cable (plugs, cable and inexpensive crimping tools are available from many electronics shops). The plug and cable must have 6 wires available, and to follow LEGO color coding, it's better that the wires color order (from left to right) be blue/yellow/green/red/black/white. Warning: If you crimp your connectors, it's better to verify that the contacts between wires and connector are good before converting the plug! |
|
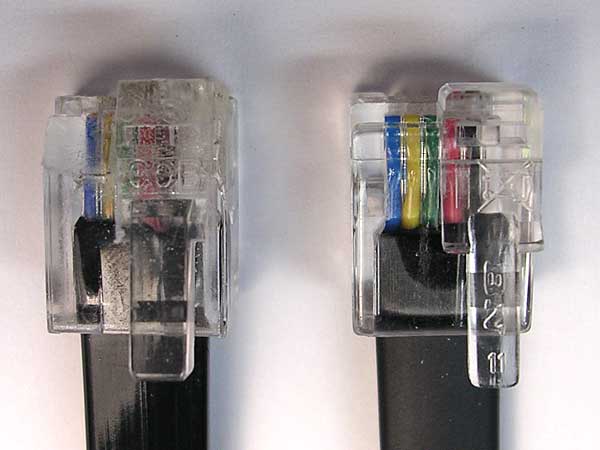
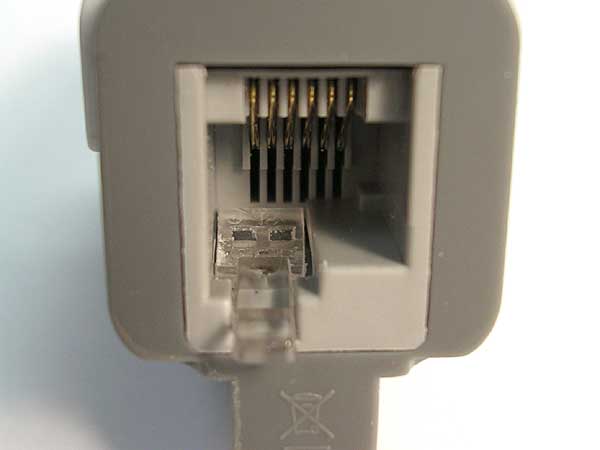
If you compare a RJ-12 plug to a NXT plug, there are two differences: The tongue of the latch is also wider on the RJ-12 plug, but since it fits the NXT socket, it doesn't matter. |
|
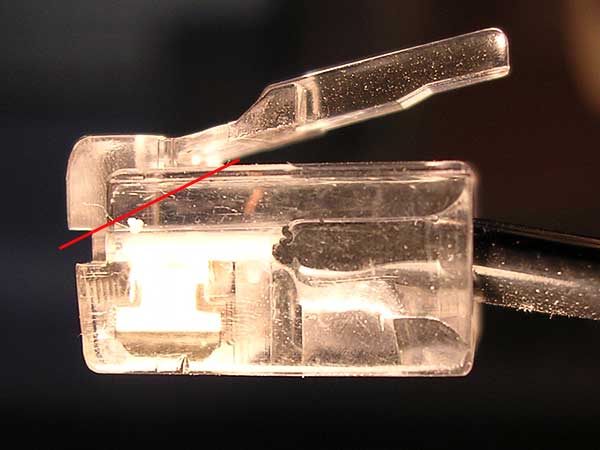
The first step will be to cut the latch, following the red line shown on this photo. |
|
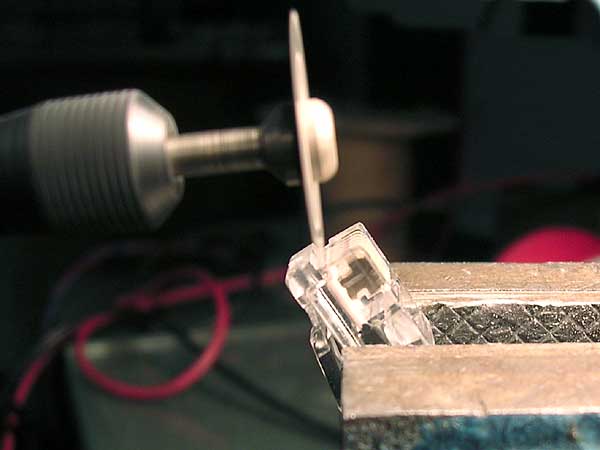
This can be done using a steel blade mounted on a Dremel. A thin model-maker saw can probably be used too. Warning: this tool cuts very well. Including your fingers! |
|
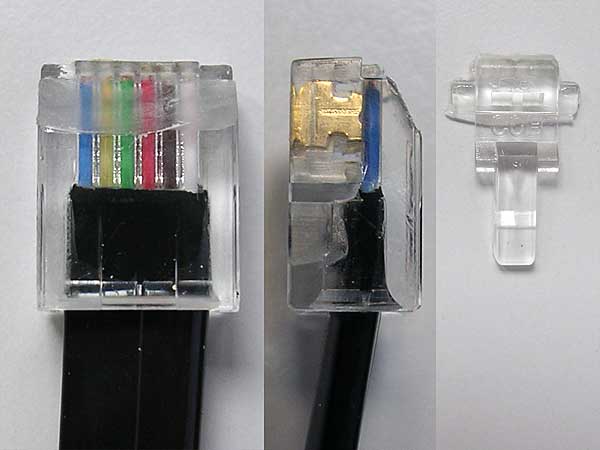
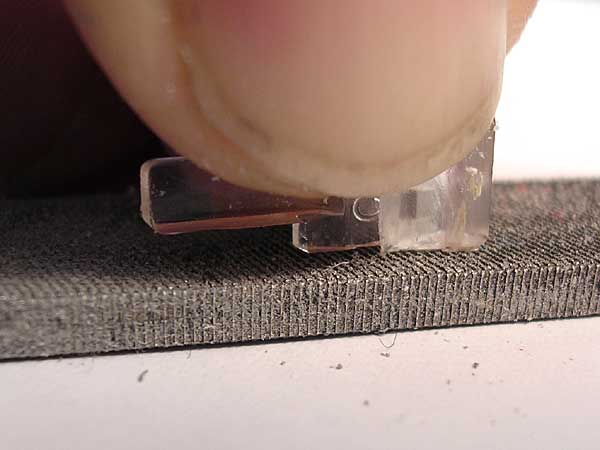
You can see here the plug with latch removed, and the latch nearby. |
|
File the sides of the latch to match the width of NXT connector latch. |
|
Alternatively, you can use the saw to cut both sides of the latch. It is much faster but easier to get it wrong (cut too much). |
|
Control your work by placing the latch in a sensor connector socket. It should easily fit in. |
|
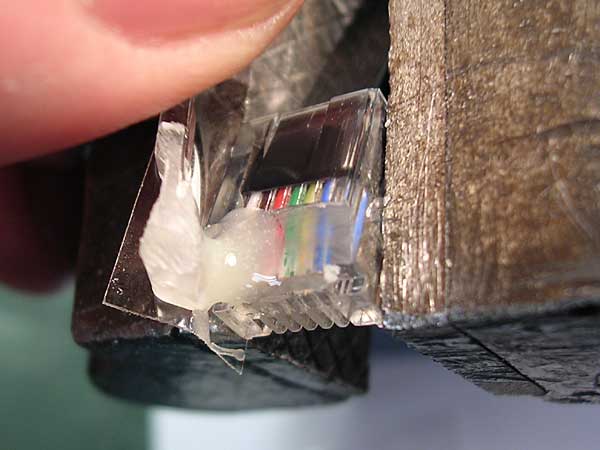
Tape the latch on right side of the plug to maintain it during gluing. It must overhang front, and have the proper angle. Check the position with a NXT connector. |
|
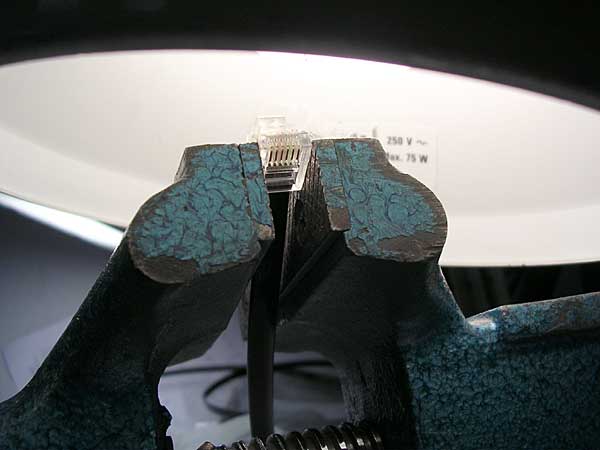
Place the connector in a vise, lift the latch and insert a drop of slow-cure epoxy glue. Reposition the latch, clean excess glue (slide a small piece of paper along the junction between the latch and the connector). Warning: Fast or ultra-fast cure epoxy is nice, but the bond is weaker. Since the gluing area is small I recommend slow-cure version. |
|
Warm the glue with a lamp to speed glue curing (2-3 hours). Warning: Warm glue is more fluid and may flow down. Warning: Don't place the lamp TOO close, it can be really hot and could melt your connector! |
|
A converted connector next to its NXT sibling. |


![]()
![]()
![]()
![]()
![]()
![]()
![]()
![]()
![]()
![]()
![]()
![]()
![]()
![]()
![]()