![]()
![]()
![]()
![]()

![]()
![]()
![]()
![]()
![]()
![]()
![]()
![]()
![]()
![]()
![]()
- The new version of the RC Receiver supports all functionality of the LPF RC protocol including single pin mode.
- The product code is the same #8884 the new item number is 4566735.
- Orders through LEGO shop online for #8884 will provide the new version.
![]() Power Functions
presentation
Power Functions
presentation
Article written in collaboration
with Didier Enjary
February 2009 update: Richard Forster-Pearson sent me schematics and photos of the Power Functions lights.
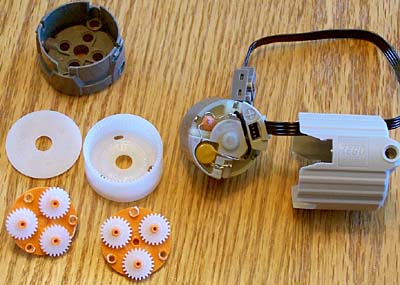
July 2008 update: Brian Davis opened a XL motor, his photos details the dual stage planetary gear reduction.
June 2012 update: Victor Sluiter made measurements Power Functions protocol, his findings are here.
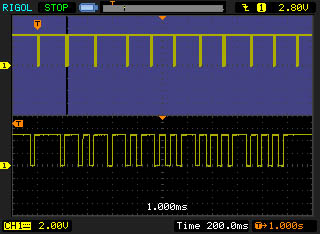
He is also building a small form factor IR receiver.
January 2008: LEGO release the infra-red protocol used by Power Functions Here is the notice accompanying the document: Last year we introduced a range of products using our new electronic building system: LEGO Power Functions. This new electronic building system will open up a lot of possibilities now and in the future. One of the new things we offer now is modular remote control. In the process of designing the Power Functions RC system we did a mapping of different RC functionalities. This mapping formed the basis of the Power Functions RC protocol and most of this is built into the Power Functions RC Receiver. The RC Handset launched now provides direct 'bang-bang' control, but the RC Receiver supports much more functionality like PWM speed control and single pin operation. Now that the Power Functions elements are available at the LEGO Shop online we have decided to release the Power Functions RC protocol as open source. Please feel free to use any information from the protocol document for personal, non-commercial use only, provided you keep intact copyright, trademarks and other proprietary rights of the LEGO Company - have fun. Gaute Munch, Technology Product Manager, LEGO Company |
October 2009: LEGO release update 1.1 of the infra-red protocol used by Power Functions Here is the notice accompanying the document: The LEGO Group has released a new version of
the LEGO Power Functions RC Receiver (identified
by a short blink on the green LED when power is
connected). The new version of the RC Receiver supports
all functionality of the LPF RC protocol and we
have added a command to access the extra address
space. Additional notes: |
March 2010: LEGO release update 1.2 of the infra-red protocol used by Power Functions |
LEGO Power Functions RC Version 1.2 (PDF, 370kb) For reference purpose, previous 1.0 version (PDF, 400kb) and previous 1.1 version (PDF, 340kb) |
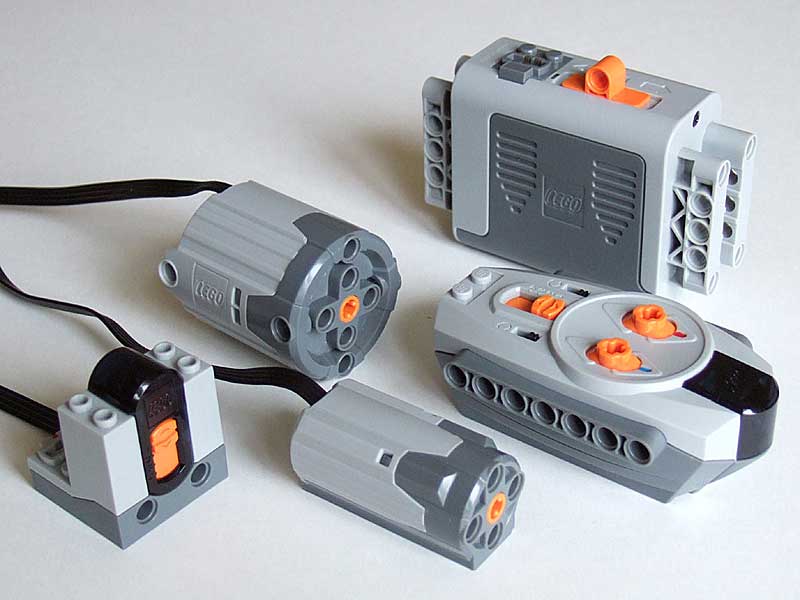
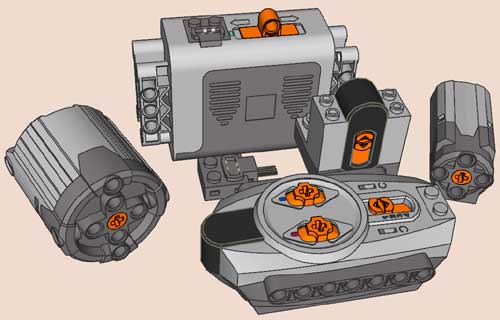
Power Functions is the new electric building system by the LEGO company released in 2007 in TECHNIC and Creator sets. The Power Functions family is composed of remote control (RC) elements, motors and a brand new type of electrical plug and wire. Let us introduce the family members. |
|
|
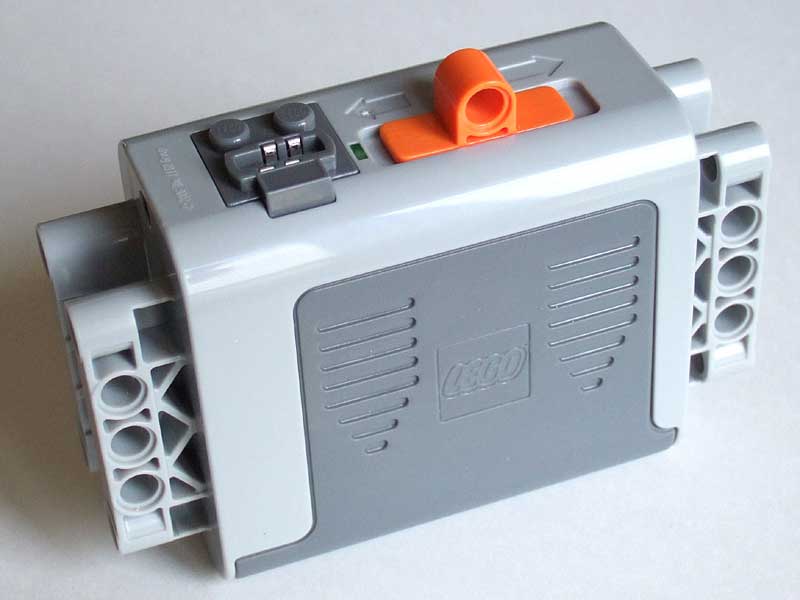
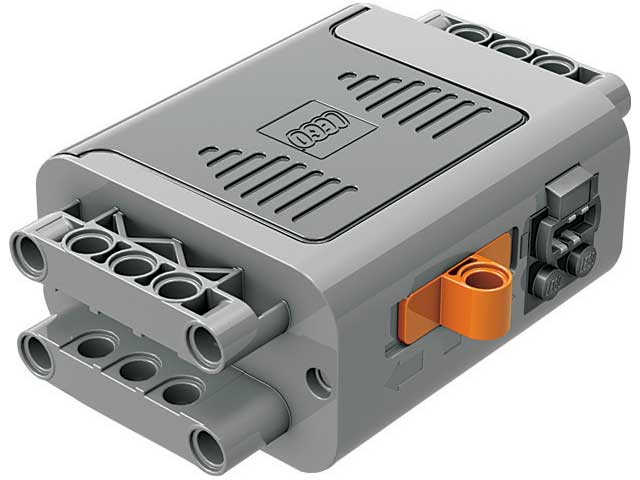
The battery box powers the system. A green light indicate that the power is on. The orange control switch can be pushed in either side driving a motor in either direction. In the middle position power is turned off. The plug is of female type and in the whole system, female plugs are the feeding plugs just like the domestic AC plugs are. The battery box needs to be filled with 6 AA-size batteries. |
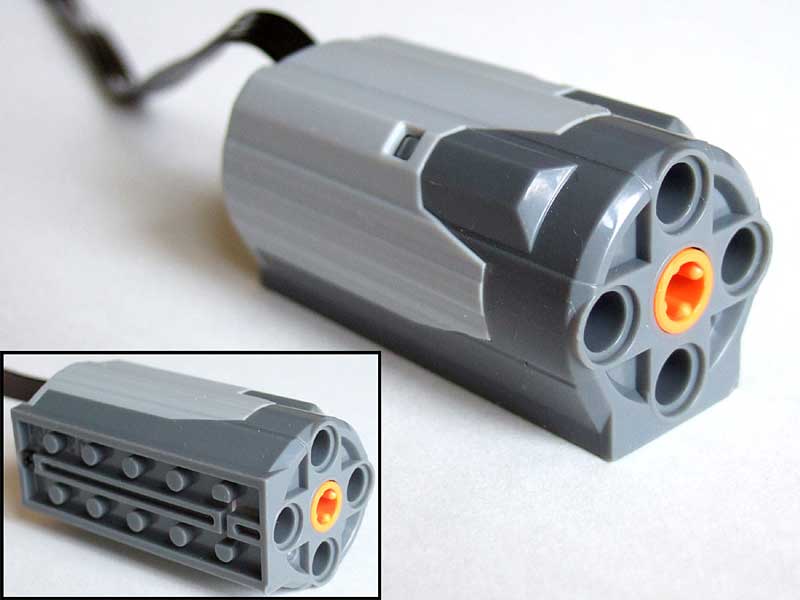
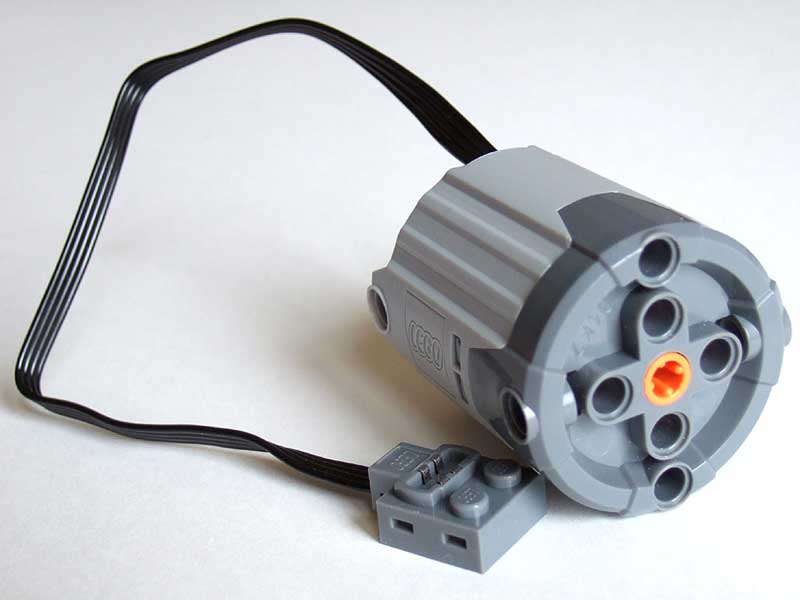
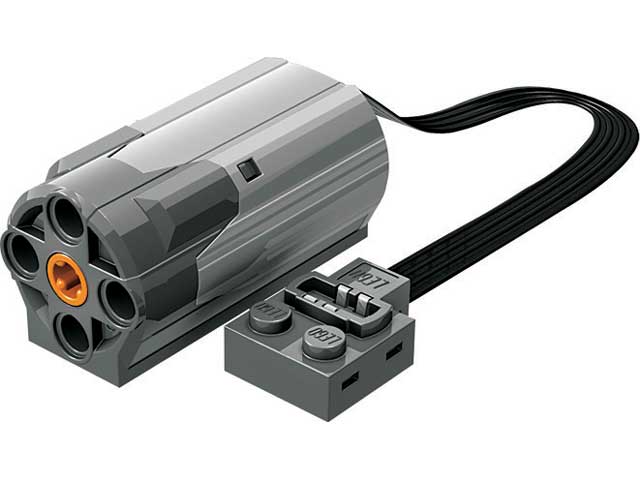
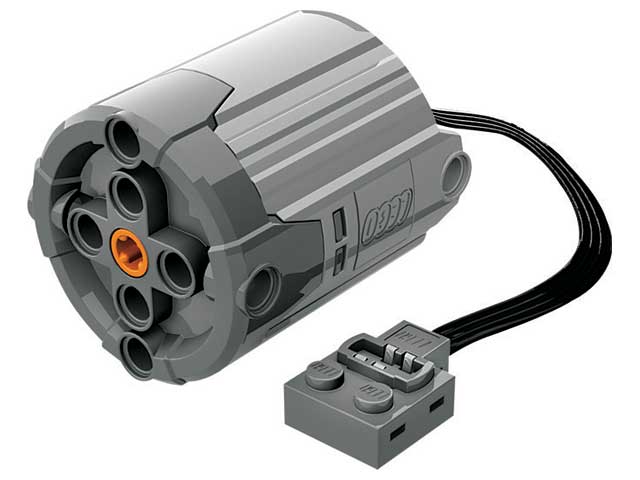
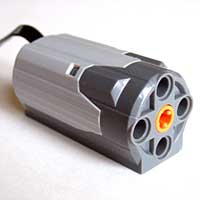
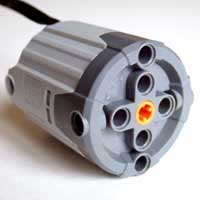
The motors are internally highly geared down,
turning slowly and delivering high torque. See the
technical measurements in the second
part of this presentation, and in the 9V
motors comparison page. They receive power through
an attached cable. There are two types of motors
: a medium one and an XL one. |
|
|
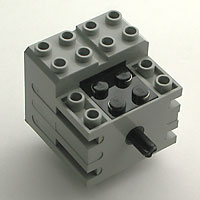
The medium motor fits both studded and studless elements as shown in the illustration. It is 6L long and 3L wide and tall. |
|
The XL motor is studless only and its diameter is 5L wide. |
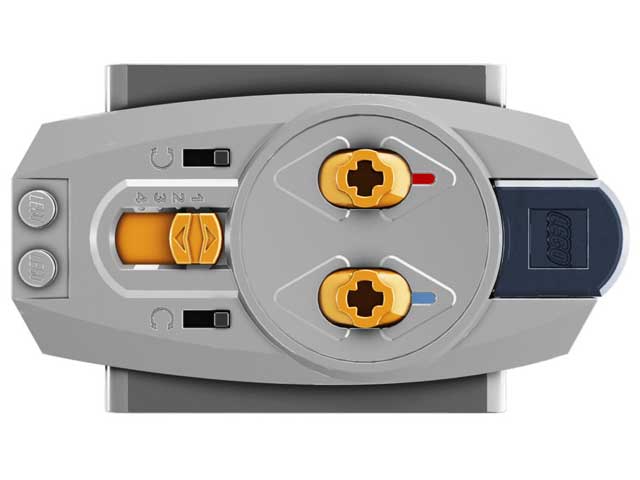
The RC handset and receiver work
together, the handset sending IR signals to the
receiver. The RC system has 4 channels and you will
find channel selectors on both the remote and receiver. |
|
|
The receiver has two outputs, red and blue coded, corresponding to the two control buttons on the handset. This way you can independently control up to 8 different functions in your models. Just like the motors, the receiver is powered through a cable. As the battery box, the outputs plugs are of the female type. |
|
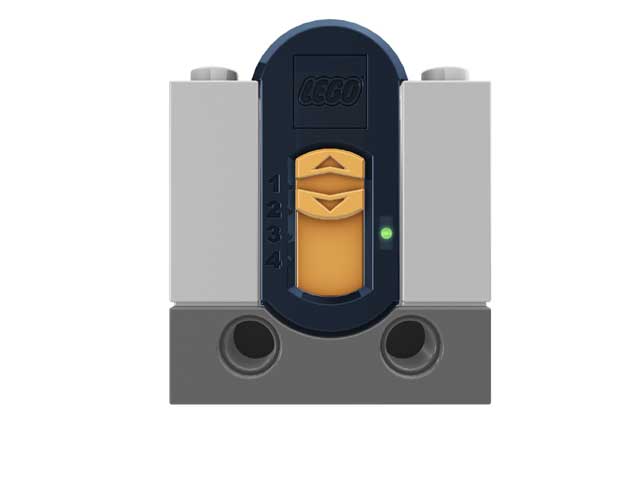
The RC handset also include two small black direction switches on each side of the channel selector, below each control buttons. They allow you to flip the direction of the corresponding output. The handset has to be filled with 3 AAA-size batteries. |
|
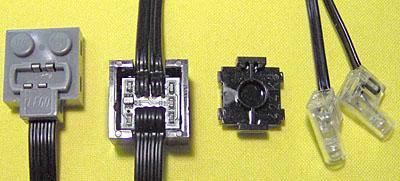
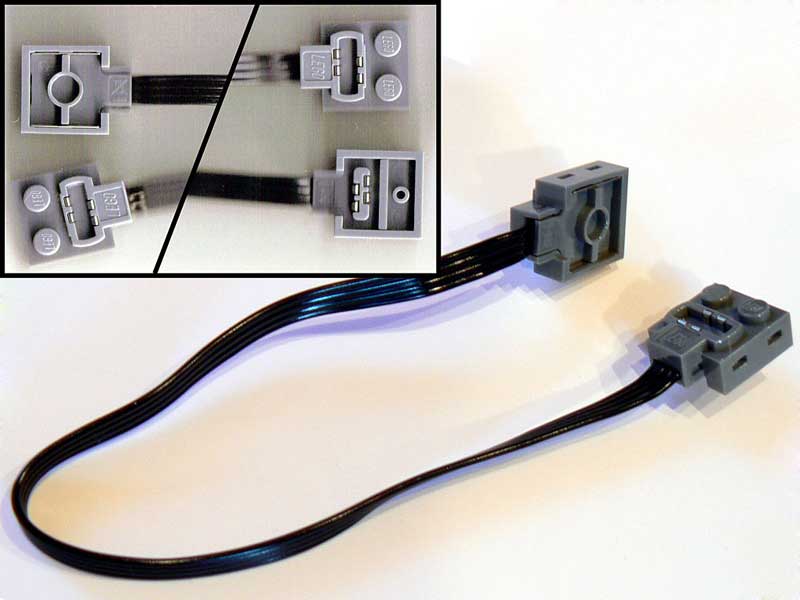
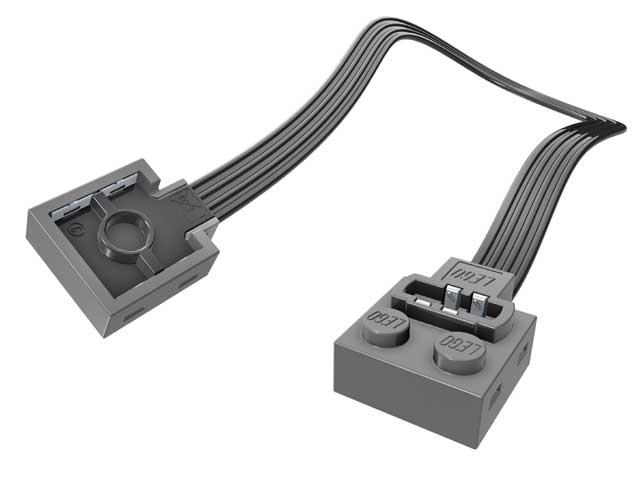
The Power Functions plug is of a new type. It has 4 connections giving new possibilities for the future. An extension wire (available early 2008) gives to Power Functions compatibility with the existing 9V electrical system and with NXT. |


Power Functions LDraw and LeoCAD parts
I have modelled all 2007 Power Functions devices. Files necessary to model your constructions are available as LDraw official parts.

Power Functions gallery
Images courtesy of The LEGO Company.


Power Functions working
Note: in the above diagram, dotted lines are
existing, but unused wires.
.
|
The
backbone of PF is a 4-wire cable ended by a new
stackable connector. This connector is keyed so
it is always plugged the right way.
Power lines carry supply voltage from the battery box to all devices that need it, such as the remote control receiver. Control signals may be outputs (the remote receiver creates C1/C2 according to IR commands) or inputs (the motor takes power from C1/C2 and turns according to their state). |
The table and diagram
below show the how the system works.
IR command |
Remote control outputs |
Motor |
|
C1 |
C2 |
||
Forward |
+9V |
0V |
Turns CW |
Reverse |
0V |
9V |
Turns CCW |
Stop |
0V |
0V |
Brake |
- Normal motors (Medium, Large and XL) as well as Power Functions light are connected only to C1/C2 lines. These lines carry electric power needed to make them turn or shine.
- Power Functions servo motor gets its power from 0/9V lines, and is controlled from the state and PWM duty cycle of C1/C2 lines
- All devices that have input and output plug pass through power lines, devices can be daisy chained. 0 and 9V are available to all element in the chain if they need them.
- The IR receiver gets it power from 0/9V lines, and according to commands received, delivers power to C1/C2 lines of its two outputs.
- The Power Functions battery packs provide power to the PF system. 0/9V lines are powered as soon as the battery pack is on, with fixed polarity. C1/C2 lines are also powered, allowing a direct connection of a motor to the battery pack. Their polarity (hence motor rotation direction) depends on the direction of the switch of the battery pack. In addition, the rechargeable battery pack has a variable speed control, and provides C1/C2 with pulse width modulated power.
A few facts and tips:
Power Functions motors compared to old 9V motor
We compare here PF motors only with regular 9V mini-motor in its two versions: the 71427 produced from 1997 to 2002 and the 43362 motor produced from 2002 to 2006. Externally identical these motors differ mainly in the weight, 43362 motor is much lighter.
All the tests below are performed with motors directly connected to a laboratory power supply.
|
PF regular has a weight comparable to 9V motors. XL is much more heavy, something to expect from such a powerful thing. |
|
Volume of the bounding box of the motor |
|
PF XL turns slowly, giving it an impressive torque. Once again, PF regular is similar to 9V motors. |
|
A weak point of PF motors: their no-load current is high, denoting internal friction. They are not well suited to low power applications such as solar panel supply. 71427 was exceptionally good for that. |
|
Maximum torque delivered by the motors (motor is blocked). PF regular provides twice the torque of 9V motors, while PF XL outdoes its rivals with an axle twisting torque! |
|
High torque comes with a price, current consumption. Note that the high stalled current of XL motor exceeds maximum current delivered by the PF remote receiver (800mA) and of its own internal protection. Maximum torque is only obtained with direct battery connection for a short time. |
|
Maximum mechanical power is delivered when load halves its no-load rotation speed. PF motors easily outdo their elders here |
|
but with a reduced efficiency. Efficiency is the ratio between delivered mechanical power and electrical power provided. Note that the best efficiency is obtained when load decreases rotation speed by 1/4 |
|
Ratio of mechanical power by motor weight. |
|
Ratio of mechanical power by motor volume. |

Conclusions
are clear: PF motors outperform their elders (sometimes with
huge difference) in all respects except energy efficiency.
PF motors power curves when connected to IR remote receiver
Since motor driver inside remote receiver has some dropout and current limitation, charts above dont tell the whole story. The two curves below show the mechanical power of PF motors driven by the remote receiver. These characteristics were measured at 9V (alkaline batteries voltage) and 7.2V (NiMH rechargeable batteries voltage).
More power curves (with other motors and pairs of motors) are available here.
![]()
![]()
![]()
![]()
![]()
![]()
![]()
![]()
![]()
![]()
![]()
![]()
![]()
![]()
![]()