![]()
![]()
![]()
![]()

![]()
![]()
![]()
![]()
![]()
![]()
![]()
![]()
![]()
![]()
![]()
Light
that screen!

NXT screen has no backlight and can be hard to read in dim lighting conditions. It is easy to build a little LED spotlight, powered by any free sensor or motor port and that can be attached next to the screen.

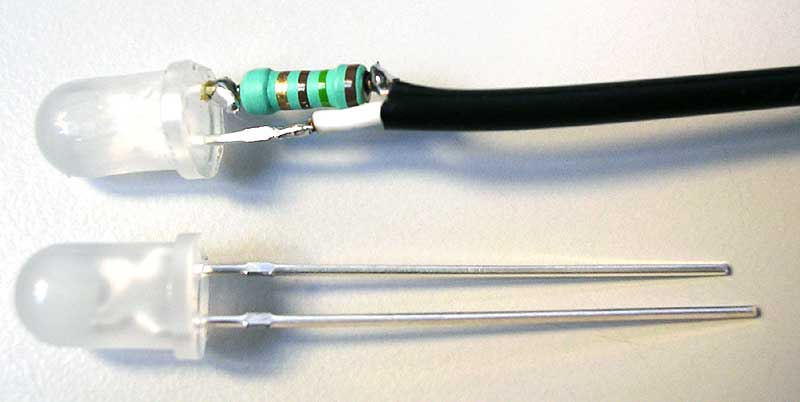
The circuit being very simple, this project
can be used as a first NXT hardware hack... A white LED (D1)
is powered through a 150 ohm resistor (R1) by the 4.3V NXT power
supply. The threshold of white LEDs is about 3.5V, so the current
in the resistor will be about (4.3V - 3.5V) / 150ohm = 5mA.
This current is low enough to avoid draining the batteries (the
LED consumes less than 1/10th of NXT idle current). The 4.3V
supply is on as soon as the NXT is started, there is no need
to program anything.
|
Choosing the LED: 5mm (T1 3/4) white LEDs with diffusing ("milky") case and a 60° viewing angle are the best. But of course other colors work too (yellow for example). You must choose a bright LED to minimize power consumption while getting good lighting. |
|
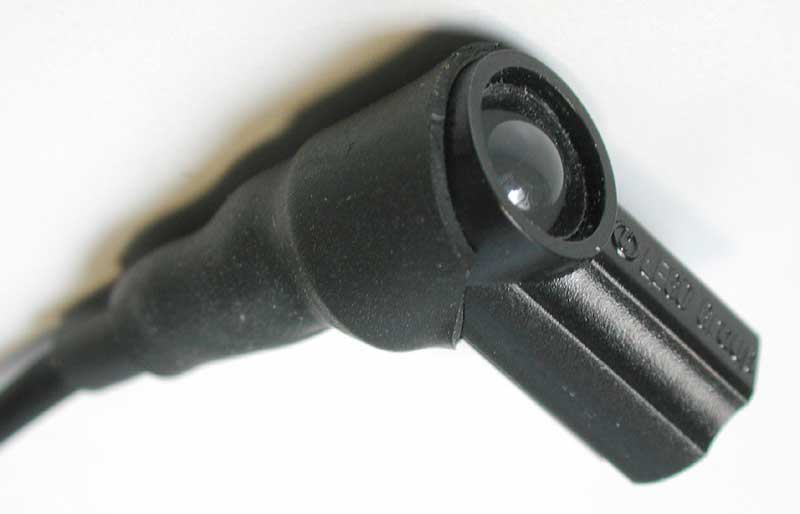
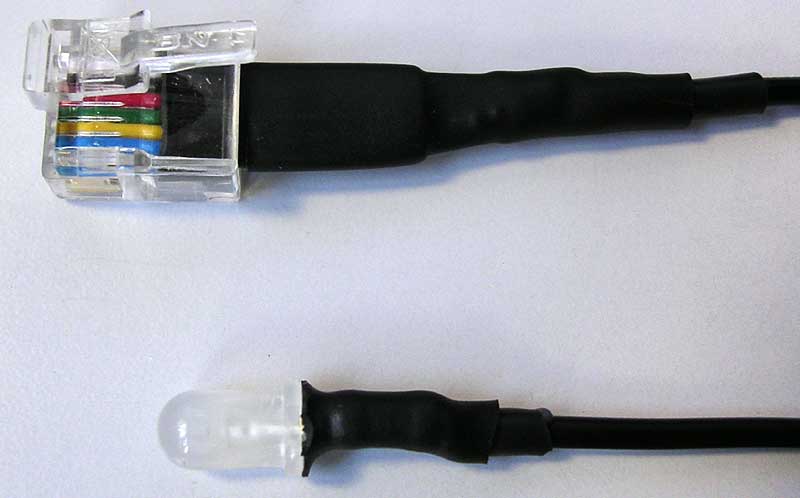
Here is the finished LED cable. The LED is inserted in the hole of a LEGO connector to mount it on the NXT. Depending on the LED model you get, it may fit directly a Technic hole or not. If fitting is too tight, you may have to either file down the LED a little to make it fit, or to slightly enlarge the hole... |
|
Close-up on the LED inserted in a Technic connector. A piece of neat-shrink tubing covering LED and connector prevents light bleeding from LED rear. |
|
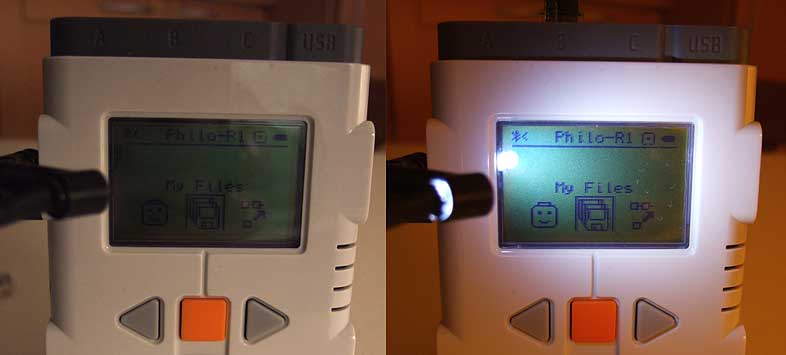
This shows the effectiveness of the lighting. In a darker room the difference can be even greater (I needed a good deal of light to get a nice photograph!) |

Construction
|
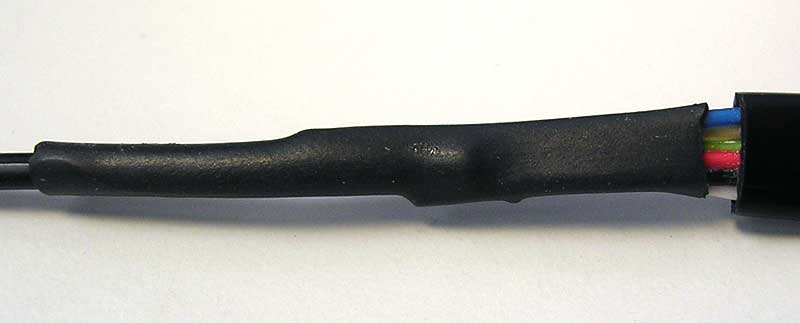
We start with a short end of NXT cable, obtained as explained here. Only the two central wires are used. All other wires are kept longer, they will perform as strain relief in the finished cable. To extend the NXT cable, choose a flexible 2 wires cable that will be connected to the LED. I scavenged a piece of coaxial audio cablefor that. |
|
The wires of the cable are cut at different lengths to avoid accidental shorting without needing individual wire insulating. Only the red (ground) and green (power) wires are needed. |
|
I added a drop of hot melting glue that will help maintaining the cables together. |
|
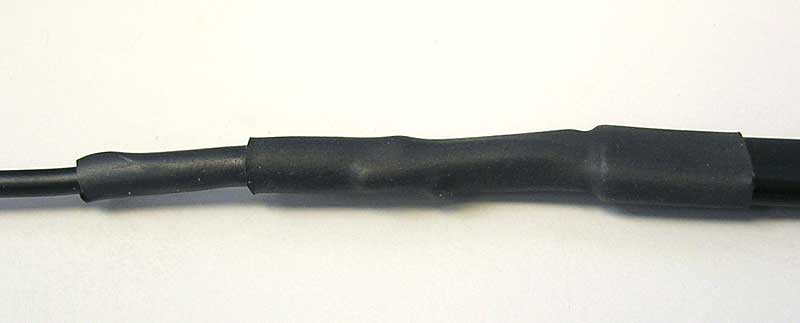
A piece of small diameter heat-shrink tubing is placed around the wires. This helps fitting different cable diameters together. |
|
...and a larger one covers the last gap. |
|
The LED is soldered at the other end of the cable. The short leg of the LED should be connected to ground through the 150 ohm resistor, the other leg goes directly to 4.3V supply. Here again, I used staggered wire lengths to avoid shorts. Warning: don't forget to insert a piece of heat-shrink tubing on the wire before soldering the LED! |
|
Both ends of the finished cable. Heat-shrink tubing were placed on LED solders. |


Side-lighting: a failed attempt
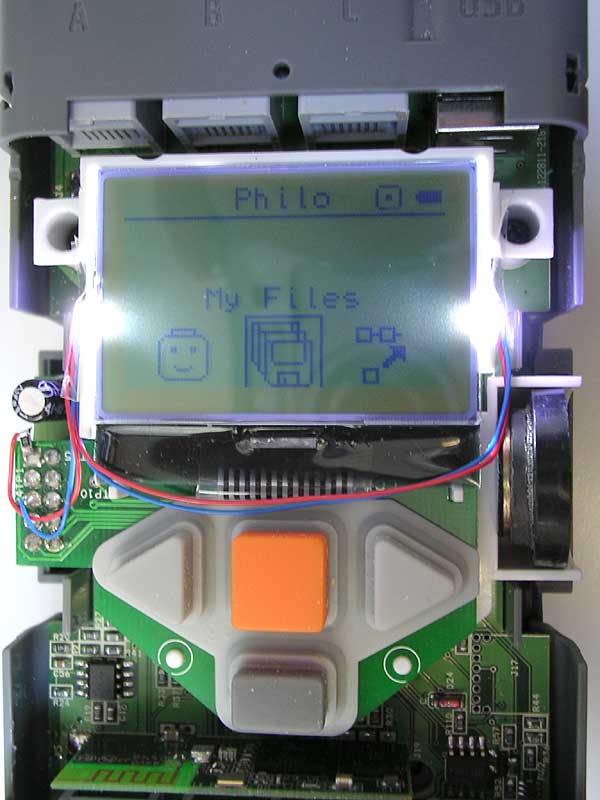
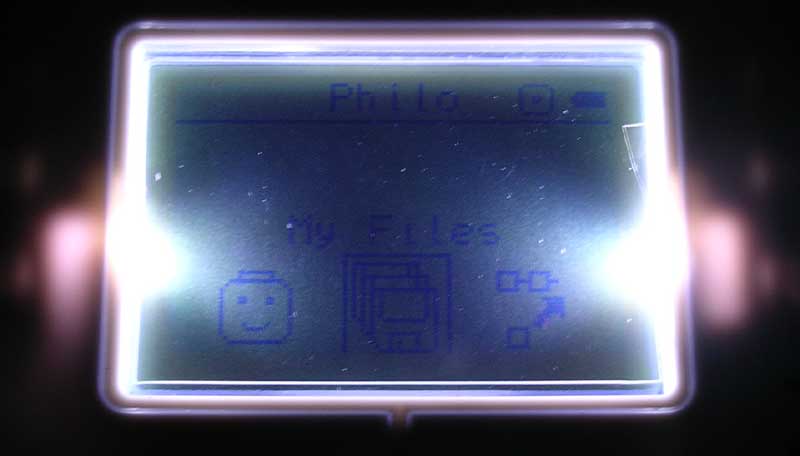
Back in the early days of MDP, I tried a more direct approach: add side lighting to the screen inside NXT case. I knew I had little chance of success, LCD screens that can be lighted that way have a special glass on top. I tried anyway, and indeed it was a failure: the screen was bright but completely washed out.
|
I placed two tiny SMD white LEDs on both sides of the screen. The power was derived from screen supply. |
|
Unfortunately, this side light washes out LCD contrast, making the screen even less legible than without lighting... |
Chinese translation of this page, courtesy of bode_chang: get it here!
![]()
![]()
![]()
![]()
![]()
![]()
![]()
![]()
![]()
![]()
![]()
![]()
![]()
![]()
![]()