![]()
![]()
![]()
![]()

![]()
![]()
![]()
![]()
![]()
![]()
![]()
![]()
![]()
![]()
![]()
- Press the shutter to wake up camera (programmed to enter sleep mode after 30 seconds of inactivity to preserve batteries)
- Hide the shade below horizon and acquire one photograph with the sun
- Restore the shade between sun and lens, and get another image without sun and artifacts.
Sky Shooter

When you are creating outdoor spherical panoramas, it often happens that the sky is really uninteresting, evenly blue or gray. One solution for this problem is to replace the boring sky with a new one, shot another day with fine clouds... So I constructed this small Lego robot, adapted to my Coolpix 990 + Fisheye FC-E8 to help me stock a few sky photographs (Some of them are available here)
This robot has two parts: a finger that press shutter release when needed, and a screen that follows sun trajectory in the sky. This screen helps to eliminate reflections in lenses as shown below. One photograph cycle is performed every 10 minutes:
|
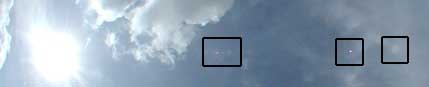
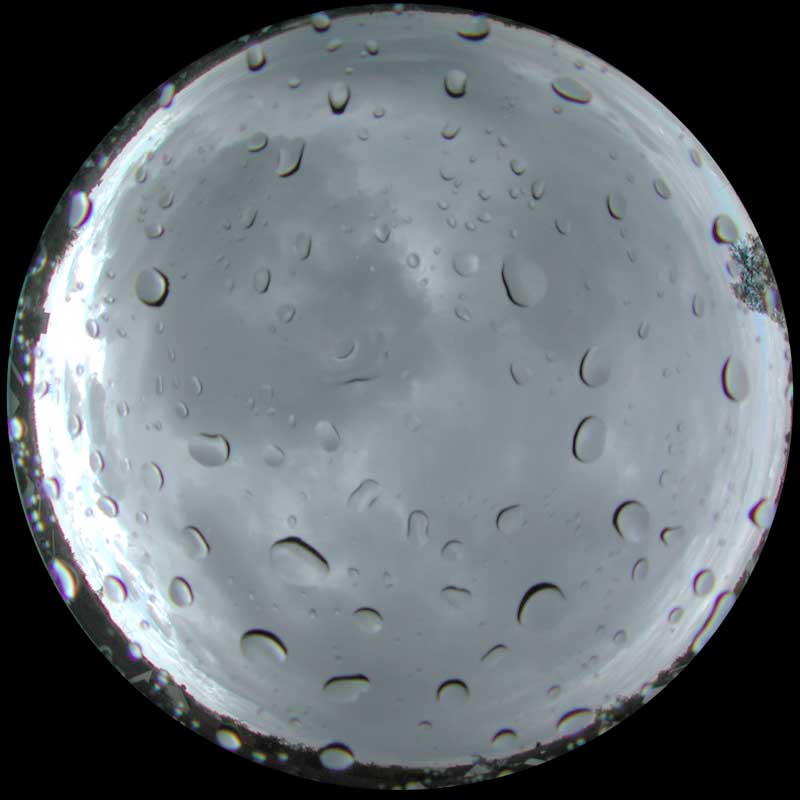
The bright sun, reflected by the numerous lenses of fisheye adaptor, creates several artefacts, difficult to eliminate all. |
|
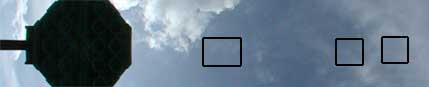
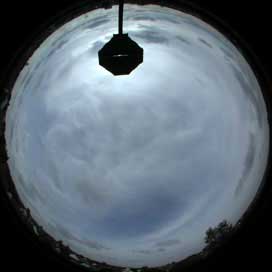
These artefacts disappear when the sun is masked |
|
The final image is obtained through blending of these images. |

The axle which supports the shade must be parallel to the
earth axis, and makes one turn per 24 hours, thus following
the sun. This requires some trimming of Skyshooter according
to latitude of your place and period of the year.
CAUTION: Exposing the CCD of your digital camera to direct sunlight for a long time WILL BURN IT. See for example what happened to Romuald who tried to create a sunset movie. The LCD viewfinder of your camera gets its image from the CCD, so this one remains unprotected between shots. On the Coolpix 990, when you disable LCD viewfinder, a shutter protects the camera, but this may not be the case with YOUR camera. Take care too of exposing the black body of your camera to direct sunlight for extended period of time, as it could get unreasonnably HOT. Anyway, I can't be held responsible for any damage to your camera... |
|
SkyShooter and camera are placed on top of a telescopic, three sections, 6 meter pole... |
|
...and the pole is installed through a roof window on my house first floor. This way, the camera is above almost all obstacles and can see an unobstructed entire sky. Only a few electricity pylons and my neighbour's tree needed some touching up. |
|
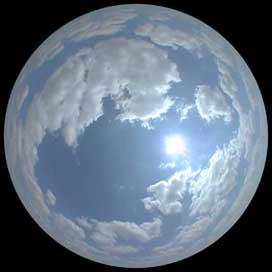
Here is the final result, after some Photoshop tweaking. Other skies can be obtained here. |
|
It's better to watch the weather ! Before I could get my camera down of the pole, I got this image showing the wonderful depth of field of fisheye lenses... |
|
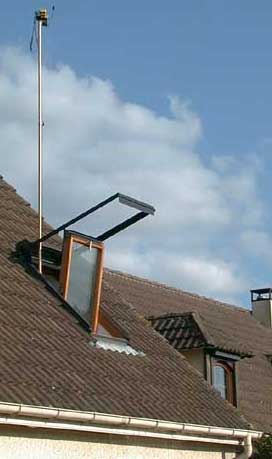
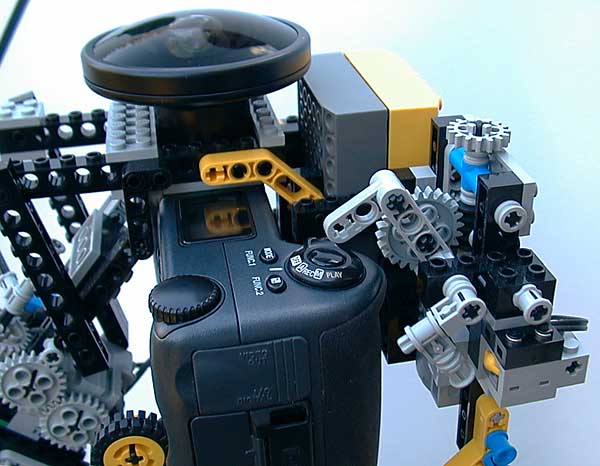
Detail showing camera position. Fisheye lens must be fixed after inserting camera in SkyShooter. |
|
Small animation showing screen movement in October, between 1 and 4 pm. The sky was particularly uninteresting that day... |

- Step
by step construction instructions
Skyshooter can be built with - and only with - parts included in Robotics Invention System (1.5 or 2) plus one rotation sensor (included in Ultimate Accessory Kit, along with a remote control - very useful too !)
LeoCad design files are available here.
- Program
Get program
here.
program
here.
- Tuning and setup
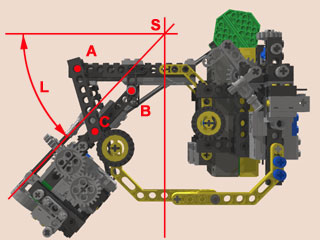
The axis which carry the shade arm must be parallel to earth rotation axis. To do that, the angle L must be equal to the latitude of your shooting site. This angle can be adjusted by varying A, B and C junction points. Take care to get point S on top of fisheye lens.
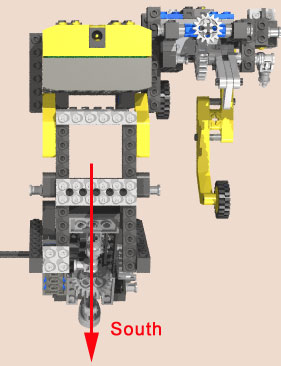
SkyShooter must be oriented this way.
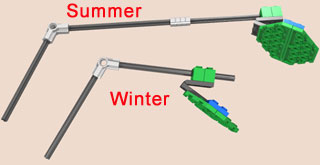
With SkyShooter correctly oriented, adjust rotation of screen arm (depends on hour of the day) and length of the arm (depends on the season) so that the shadow of the screen covers center of fisheye lens. Then start the program. The position of the arm will be updated each time a new image is shot.
Of course, I made this adjustements in the garden, with SkyShooter mounted on a tripod. When everything is ready, I climb upstairs and install the thingy on the pole (with RCX on to keep time)
Don't forget to disable the auto-off function your RCX, and on the contrary set your camera to the shortest auto-off to preserve batteries. And read again the CAUTION notice above !
![]()
![]()
![]()
![]()
![]()
![]()
![]()
![]()
![]()
![]()
![]()
![]()
![]()
![]()
![]()